Add links and blocks
Everything on your page is added from one place: Links & Content in the editor, then the Add button. A plain link is one block type among many. You can also add a tip jar, a product, a countdown, an embedded video or an FAQ, and they all sit in the same list in whatever order you put them.
Add a link#
-
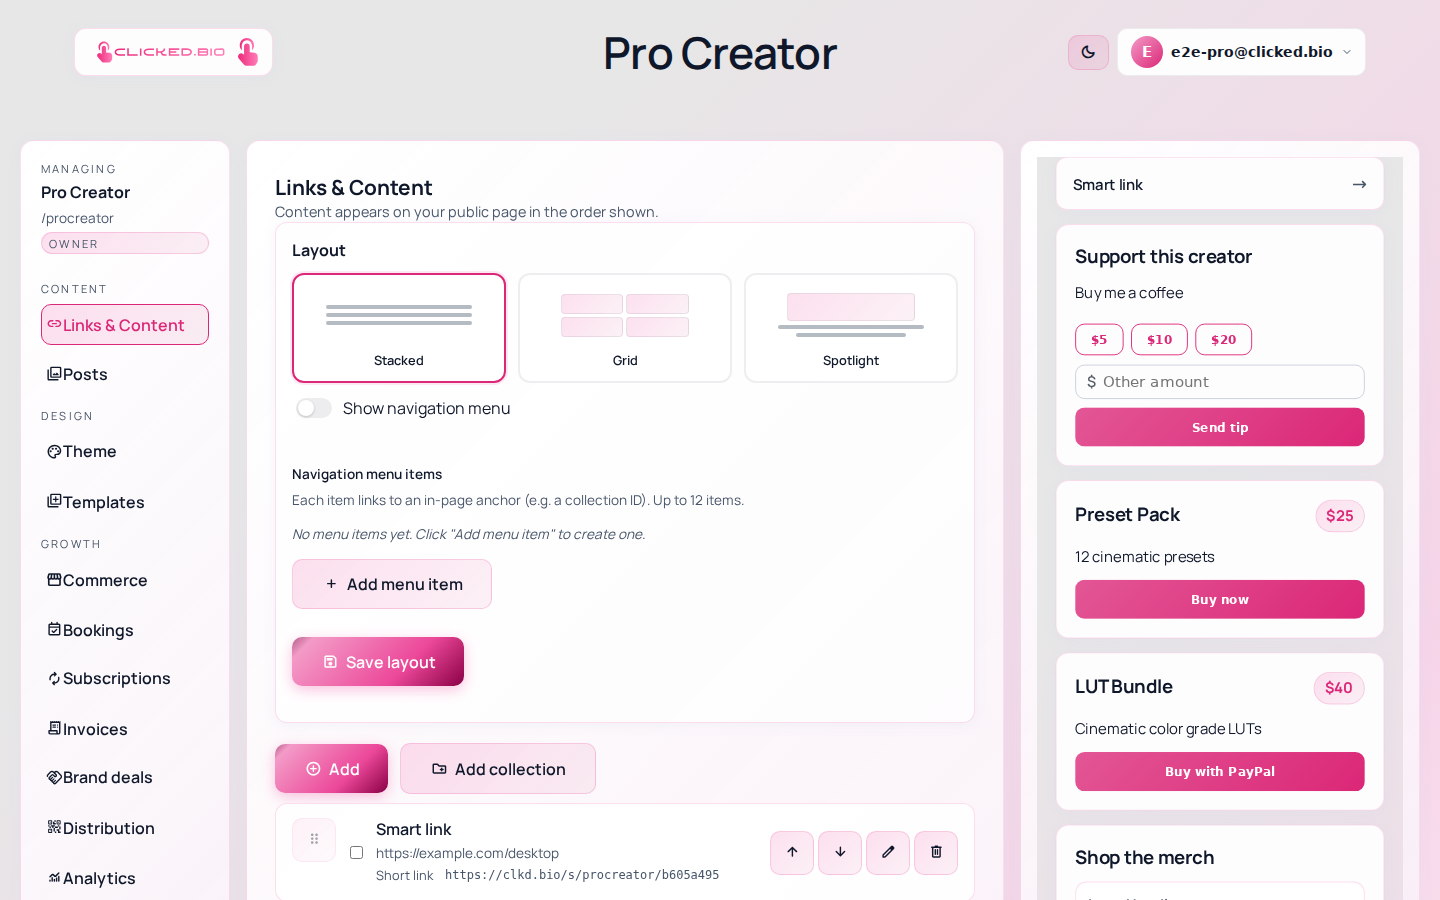
Open Links & Content
It is the first panel in the editor, under CONTENT.
-
Click Add
A picker opens with every block type in it, grouped by what they do.
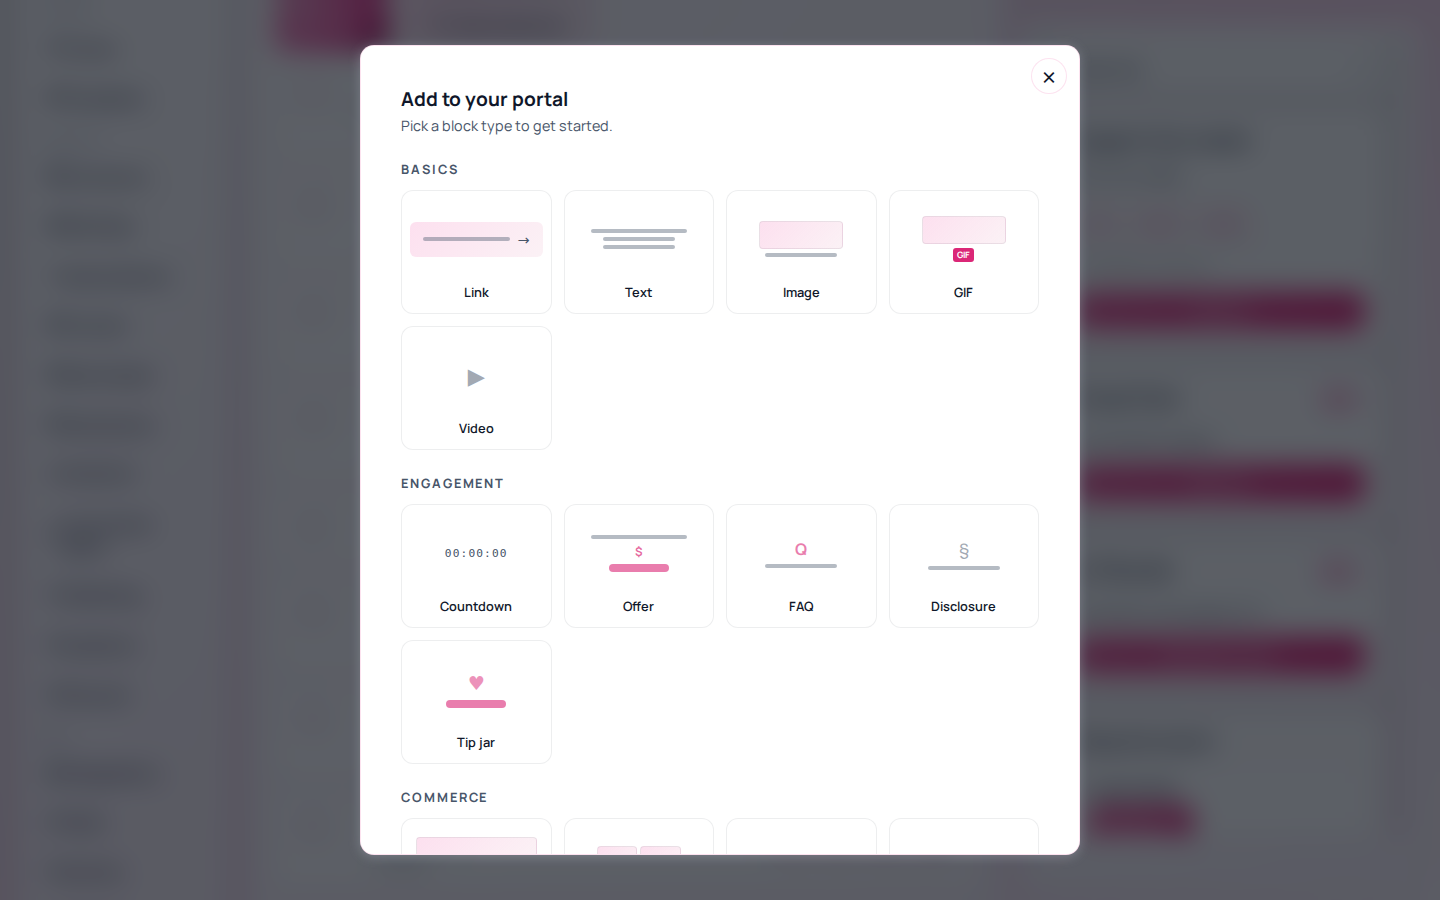
Every block type clicked.bio can add to a page. -
Choose Link, then fill in the label and the URL
The label is what visitors read, so write it as an instruction rather than a noun. "Get the preset pack" beats "Presets".
-
Save
The preview on the right updates immediately, and so does your live page.
What the block types are for#
The picker groups them, and the grouping is the fastest way to find what you want.
- Basics — Link, Text, Image, GIF and Video. The building materials.
- Engagement — Countdown, Offer, FAQ, Disclosure and Tip jar. Things that create a reason to act now, plus the disclosure block for marking paid partnerships.
- Commerce — products, a storefront, bookings and subscriptions. These need Stripe connected before they can take money.
Two are worth knowing about early. The Tip jar works on every plan including Free, which makes it the fastest thing on the page to turn on. The Countdown can keep a button locked until a set time and unlock it automatically, which is how you run a drop without being awake for it.
Change the order#
Each row in the content list has an up arrow and a down arrow. Use them to move a block. The order in the list is the order on your page, top to bottom.
The first block gets far more clicks than the fourth. If you are promoting one thing this week, move it to the top rather than adding another link for it.
Pick a layout#
At the top of the panel there are three layouts, and the difference matters more than it looks.
- Stacked — one full-width block per row. The safest choice, and the easiest to read on a phone.
- Grid — two per row. Fits more above the fold, but each one gets less attention.
- Spotlight — one block given prominence, the rest below it. Use when there is genuinely one thing you want clicked.
Click a layout, then Save layout.
Add a navigation menu#
If your page has grown long, turn on Show navigation menu and add up to twelve menu items. Each one jumps to a section of the page. It is worth doing once you are past about eight blocks, and not before.
Group blocks with collections#
Add collection groups several blocks under one heading. Useful when you sell things in categories, or when your links split into obvious groups like "watch" and "shop".
If something is not working#
- A block you added is not on the public page Check whether it is scheduled. A link with a start date in the future stays hidden until then, by design.
- A commerce block shows nothing to buy Product and storefront blocks need a product to exist first. Create it under Commerce, then point the block at it.
- You have hit a product limit Free includes one product. Blocks themselves are unlimited on every plan; it is products that are capped. See pricing.
Next: read your analytics to find out which of these blocks people actually click.